Posted on

Rhubarb Bread

I like to make quick breads for my family to eat with their meals. One of the most popular is banana bread. I also shred and freeze zucchini in the fall for making zucchini bread throughout the winter. I don’t like to feel trapped with making the same breads over and over, so I set out to find something new.

I was quite specific in my searching because my rhubarb is starting to come up, and I wanted to use up some frozen rhubarb from last season. I found a few different rhubarb quick bread recipes, but I finally settled on one that had a lower amount of sugar and all the ingredients I already had on hand.

I always substitute honey or syrup for the sugar in quick breads. I also cut down on the sweetener used because most quick breads just don’t need a high amount of sugar to still taste good. I was a little nervous doing this with rhubarb because it is so tart, but the bread turned out delicious!

You will need to puree some rhubarb for this recipe.

Rhubarb Puree

1 cup rhubarb, chopped
1/4 cup water

Combine the rhubarb and water in a small pot and bring to a boil. Reduce heat and simmer for about 10 minutes or until rhubarb falls apart into a thick sauce. Remove from heat and let cool.

Rhubarb Bread

Dry Ingredients:
1/2 cup walnuts
1 1/2 cups flour
1/2 teaspoon baking soda
1/4 teaspoon salt
1/4 teaspoon nutmeg
1/2 teaspoon cinnamon

Wet Ingredients:
1/2 cup syrup (if using dry sweetener, combine with dry ingredients)
1 Tablespoon lemon zest
2 eggs
1 cup rhubarb puree
1/2 cup oil

1/2 cup rhubarb, chopped (fresh or frozen)

Heat oven to 350 degrees. Grease bottom of loaf pan.

Combine all dry ingredients and mix together.
Combine wet ingredients and add to dry mix. Stir to combine.
Stir in chopped rhubarb.
Pour batter into loaf pan, and bake for about 1 hour.
Remove pan to wire rack and let cool 10-15 minutes before removing bread.
Remove bread from pan and let cool on wire rack.

Slice and enjoy!

Posted on

No More Pink Eye – Calendula Tea Instead

Pink Eye can be a bit of a nuisance on a dairy farm.  What makes it even more annoying is that it’s zoonotic.  That simply means that it can be transferred between animals and humans.  Several years ago, I developed a severe case of pink eye and went to the clinic to try to get rid of it.  They gave me some eye drops, and I was quite happy to use them as I was desperate for relief.  My eyes, however, just continued to worsen as the whites started to swell out past the iris.  I just kept using the drops thinking it would eventually help but to no avail.  After a quick call to the local clinic, I was advised to discontinue the use of the drops as I was having an allergic reaction to the sulfa in them.  That’s when I began my quest for a more natural remedy.

My herb of choice is Calendula, also known as Pot Marigold.  It does not grow wild in Wisconsin so I grow my own. However, it can be purchased at many health food stores.  The flower petals are known to have healing properties and can be used for many ailments both internally and externally.

Calendula Wash Recipe: Put one handful of Calendula petals in a low wide bowl.  Pour boiled water over and let steep for about 1 minute.  Strain.  Let water cool to room temperature and bathe your eyes in the solution as needed.  For small children it may be necessary to use an eye dropper to get it in their eyes.

I’d like to mention that whenever we’ve used this remedy the pink eye appears to be gone overnight.  I would recommend using the wash for a couple extra days just to be sure that it’s gone for good.

Resources:

Posted on

DIY All Natural Extracts

I have been on a breakfast shake kick lately and have been using a lot of mint in the shakes. It doesn’t take very long to strip a small mint plant of all its leaves, though. I needed a way to make my mint last longer, so I decided to pick all of the leaves and make mint extract with them. This way, I can use a bit of the extract in my shakes and make the leaves last a lot longer!

There are only two ingredients in a homemade extract: vodka and whatever you are using to flavor the extract. I bought a large bottle of the cheapest vodka I could find, and divided it up among six half pint jars to make five different extract flavors.

Each jar was first filled with the flavor of my choosing. Then, I simply poured the vodka over it and tightly screwed on the lid. Once every day, or every other day, I have to shake the jars. The extracts have to “cure” for 4-8 weeks before they are ready to be used.

Any alcohol that is at least 80 proof (or 40% alcohol) will work to pull or “extract” the flavors. Vodka is most often used because it is basically tasteless, odorless, and clear.

The extracts I made were:

  • Strawberry: contains chunks of strawberries
  • Cinnamon: contains about half a dozen cinnamon sticks (this one might be pretty potent)
  • Mint: contains all of the leaves off a small mint plant
  • Almond: contains a dozen almonds (Skinned almonds would be best. Mine still had skins on which might make the extract a bit bitter.)
  • Two vanilla beans: each jar contains one vanilla bean cut in about 1 inch pieces

Resources:

Posted on

Nettles…Not Just A Pesky Weed

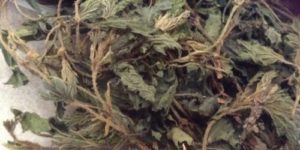
Homestead Bootcamp Nettles

If you’ve ever brushed up against a nettles plant you probably consider it a very memorable experience! Some people think they are allergic to nettles. That, however, is most likely incorrect. Unlike poison ivy, which has an oil that causes an allergic reaction in many people, nettles has tiny hair like follicles on the leaves and stems that embed themselves into any tender skin that touches them. It almost immediately causes a burning and itching sensation, thus giving it the name “stinging nettles”. It is possible to tame the beast. The hair like follicles soften when placed in very hot water and they are also rendered helpless when they are completely dried.

So why do we care about this seemingly pesky weed? It just happens to be one of the most important medicinal plants! A great use for dried nettles is for making tea. It has blood purifying properties and is wonderful for helping to detox your liver. It’s also good for acne, allergies, colds, constipation, eczema, headaches, iron deficiencies, joint inflammation, arthritis, gallbladder issues, stomach ulcers and stimulating hair growth, just to name a few.

The fresh nettles are said to be useful in helping with arthritis by touching the arthritic area with the fresh nettle leaf. I realize that this doesn’t sound pleasant, but the flow of blood to that area will help with inflammation that causes pain. It is even listed on the Arthritis Foundation website as a supplemental herb.

This gives you an idea how valuable it really is. Hopefully, you’ll never look at it as just a pesky weed ever again.

Here’s the tea recipe: (I would suggest using a tea ball but you can just strain them off if necessary.)

Place one heaping teaspoon dried nettles in tea ball or cup. Pour boiling water over herbs (never place herbs in boiling water) let herbs steep for 30 seconds to 1 minute before straining them off or removing tea ball. Drink as hot as possible.

Do not drink more than 3 cups per day to avoid irritation of the kidneys. Do not drink while pregnant! You don’t need to do it every day, but try it for a continuous 2 weeks every now and then and see how much better it can make you feel.

Resources:

Posted on

Two (or Three) Ingredient Homemade Laundry Detergent

I was given a recipe for home made laundry detergent several years ago that had both a powdered version and a liquid version. The liquid version took longer to make and more room to store, so in favor of speed and ease, I chose the powdered version.

The original recipe called for Borax, Super Washing Soda and Fels-Naptha soap. My daughter found the Fels-Naptha undesirable because it seemed to put a coating on their clothes and the washing machine. I still use it, but she chooses to just keep a bar on hand to scrub out stains before throwing the clothes in the washer.

To make the basic version, simply buy a box of Borax and a box of Super Washing Soda (not to be confused with baking soda), dump them both in a bucket, and mix them. That’s it! Of course, the original recipe calls for equal amounts of each ingredient, but who has time to measure!?!

I generally use 2 Tablespoons per load because that is a full scoop with the little scooper I have, although 1 Tablespoon is the recommended amount.

For our whites, I dump in some home made bleach, too. You can also hang clothes on the line when the weather permits to let the sun bleach them, and it helps save electricity when you don’t have to run the dryer.

Additional laundry cleaning recipes can be found on the Wellness Mama blog.

Resources:

Posted on

Dehydrating: Drying Foods for Long Term Storage

When planning and planting your garden, consider how much produce you can use and how much you need. You don’t want to plant rows and rows of spinach only to have most of it go to waste because you can’t eat it fast enough and you find that you only enjoy it fresh. Most produce can be frozen, canned, dehydrated or otherwise stored to be used throughout the winter months when nothing is growing. Due to a variety of reasons (some more practical than others), our clan has been slowly moving away from freezing and focusing instead on canning and drying.

Our garden covers about 8,000 square feet. This means that there is a lot of produce to store away. That may seem like an extreme amount of garden space for one couple, but our clan consists of 18 people.

We have three identical dehydrators belonging to various clan members that tend to rotate between who needs them at the time. Growing and drying your own herbs is another popular choice. You can make your own Italian seasoning or chili powder. One of our daughters likes to grow hot peppers, dry, and grind them up for red pepper flakes to use in homemade chili powder and to sprinkle on pizzas. Onions and garlic can be dried and ground to make powders, as well. Imagine a spice rack where everything came from your garden!

In the fall, everyone will be drying apples. Dried apples are often used as snacks, but you can also use them for baking. Simply re-hydrate and use as normal. They won’t be crisp, but baking will make them soft anyway. You can also dry strawberries, raspberries, blackberries, cranberries, and cherries. Granola is a wonderful way to use dried fruit.

We don’t eat commercial cereal, but our grandkids like granola cereal. The kids enjoy selecting their own dried fruits to add to their cereal. It is something like a buffet. And what kid doesn’t like making some of their own decisions when it comes to food?

Beef jerky is another popular dehydrator snack. We occasionally get paid in beef from a relative’s farm, so jerky is a good way to use up some extra beef! Jerky sticks are perfect for road trips or camping trips. They are easy and delicious, and everyone loves them. We also dry kale for kale chips and add some homemade garlic powder.

For specific drying times, recipes, and tips for use, look at the manual for your dehydrator. If you can’t find your manual or need a quick reference, you can check out the Nesco dehydrator manual PDF.

Resources:

Posted on

Kale Chips

Kale chips are a healthy alternative to potato chips and a good way to get some extra greens into your diet. They add a nice salty crunch to a meal and are delicious! I know they get bad mouthed a lot, but we actually really enjoy them as snacks and as a side to our meals. They are a bigger hit with some of the clan than salads, so it is an easy way for our family to eat vegetables.

These can be made in the oven, but they burn easily if you don’t watch them like a hawk. I rarely have time to stare at my oven, so I prefer to make them in the dehydrator. This takes a little longer but guarantees they will be crunchy and perfectly cooked every time.

This is the basic recipe, but don’t be afraid to try different seasonings and spices.

Ingredients:

  • 1 head of kale (rinsed)
  • Olive oil
  • Sea salt

Directions:

Tear the kale off the stems and into bite sized pieces. Pour some oil olive into the palm of your hand and massage it into the kale. Sprinkle on sea salt to your liking and toss to coat them all.
Spread the kale pieces onto your dehydrator trays. Dry for 2-4 hours. Store in airtight container.

Ours have never lasted longer than 2 weeks, but they will stay crispy for at least 2 weeks when dehydrated. Oven baked chips will lose their crispiness after a few days.

Posted on

Bleach That You Can Bathe In (If You Really Wanted To)

There is a lot of dirt around our homestead, so light colored clothes don’t usually stay clean for all that long. And I have never liked commercial bleach. It stinks. It can ruin clothes. And I have been known to spill and/or drop liquids from time to time.

During the summer, the sun is a good way to help bleach clothes. When that isn’t enough, here is a recipe that can help get those whites whiter!

Ideally, you would make the bleach in a jar or jug and have a large container on hand. I make it as I need it, so this recipe is for one load of laundry.

Ingredients:

  • 3/4 cups water
  • 1/8 cup hydrogen peroxide
  • 1/2 Tablespoon lemon juice or vinegar (of course, fresh squeezed is best)

Put all ingredients together and dump them in the washer with your homemade laundry detergent (or store bought if you prefer).

Posted on

Granola Cereal Recipe

We don’t eat commercial cereal, and we try to stay away from processed foods. However, kids love cereal for breakfast, and it is a quick and easy way to start the day. So, my daughter makes homemade granola cereal. It is a delicious alternative to store bought cereal, and it is a wonderful topping on a fruit parfait.

If you don’t have all of the dry ingredients, you can skip them and/or add more of another one.

Dry Ingredients:

  • 4 cups rolled oats
  • 1/2 cup wheat germ
  • 1/4 cup sunflower seeds
  • 1/2 cup chopped nuts
  • 1 teaspoon cinnamon
  • 1 teaspoon salt
  • 1 cup raisins

Wet Ingredients:

  • 1/2 cup water
  • 1/2 cup maple syrup (or honey)
  • 1/3 cup applesauce (or coconut oil or butter)
  • 1 teaspoon vanilla

Directions:

Preheat oven to 300°F.
Mix the dry ingredients together in a bowl, and mix the wet ingredients together in a separate bowl. Pour the wet mixture over the dry mix to combine. Spread on a greased pan.
Bake for 50-60 minutes, stirring every 15 minutes. Cool in pan on wire rack, and store in airtight container. Add raisins before storing.

You can also dry can the granola for longer term storage.

Posted on

Healthy Cough Syrup Recipe

In the winter (which lasts quite a while in Wisconsin), many people get hit with the winter colds or flu. We don’t very often get a cough that goes through our clan, but when it does, it can keep an entire household awake at night with just one person coughing constantly.

Store bought cough syrup tastes terrible (unless it is loaded with fake chemical flavors), and who knows what is really in it!

We opt instead to make our own cough syrup with ingredients that we know are beneficial and healthy.

Ingredients:

  • 3 Tablespoons Lemon juice
  • 1/4 cup Honey (local if possible)
  • 2 Tablespoons Coconut oil
  • 1 teaspoon Cinnamon

Directions:

Mix the ingredients together and warm in either a saucepan or in the microwave before using. Drink a spoonful or add a spoonful to a cup of herbal tea or warm water.
Store in the refrigerator.

Resources: